For animations it is
always good to allow the user community to create (and hopefully share)
their own art and characters. Here, the advanced user will find the C++
based features of WCM extremely useful.
Note: This would also be a
good time to review the “Simple Character Creation” tutorial, which is
similar in content, but written from a somewhat different perspective,
to the following paragraphs.
To make a completely new character in WCM, you must first define a new
class derived from
ICharacter
or another class derived from
ICharacter
like
ISpeakableCharacter
,
IHumanCharacter
or
IHumanCharacterSideView
. As noted earlier these classes are incomplete, however they have many
useful methods to register and work with characters. Some of them also
have common parts declared but none of them have actual pictures
assigned with parts. However to make these classes useful you need to
derive a new class from them. In this example, we'll make a simple
butterfly character by deriving a new class from
ICharacter
:
class Butterfly :
public ICharacter
{
public
:
Butterfly () :
ICharacter ()
{
}
};
This class as currently written is still useless. It is basically just
an outline and does not bring any new functionality to
ICharacter
. To make it a real character we need to do the following:
Declare all the desired parts (like Body, Head and so on). Some of the
advanced interface classes already have some parts declared. For
example
ISpeakableCharacter
has a
Mouth
part declared.
IHumanCharacter
and
IHumanCharacterSideView
have
Mouth
,
RightArm
,
RightLeg
,
LeftLeg
,
Body
,
Head
,
RightEye
,
LeftEye
and
LeftArm
declared. We are going to derive a new character from simplest
ICharacter
interface and will need to declare all the parts by ourselves.
Register
character's dimensions and origin location using method
Register
in constructor.
Register all the parts in character's constructor specifying
their default decal pictures, their coordinates relative to parent's
origin (relative to character's origin if there is no parent) and part
origin's coordinates using method
RegisterPart
.
If some parts have parents you must register parents using part's
RegisterParent
method
Register any additional decals using part's
RegisterDecal
method.
First of all let's find a
couple of butterfly pictures with wings up and down. You can download
these two images:
Download these images or create you own 300x300 pixels images and save
them as
"C:\\ButterflyCharacter\\butterfly1.svg"
and
"C:\\ButterflyCharacter\\butterfly2.svg"
These are two 300x300 pixels images. Let's use these dimensions as the
dimension of our character. We'll use coordinates (175,145), relative
to left upper corner, as the origin point. This is actually a middle of
butterfly's body. Our character will have only one part –
Body
. It will also have 300x300 pixels dimensions and origin located at
(175,145). The coordinates of Body's origin relative to character's
origin will be at (0,0). (This is generally recommended for consistency
between characters.) We'll use the first picture as the
"DEFAULT"
decal and register the second image as an additional decal:
Alan Sturgess shared an excellent video he made using Tales Animator! You can still download Tales Animator here. Unfortunately it is only available for Wi
There is a prototype of simple online character designer available
HERE. It is only a prototype,
it does not contain many pieces yet but it can already generat
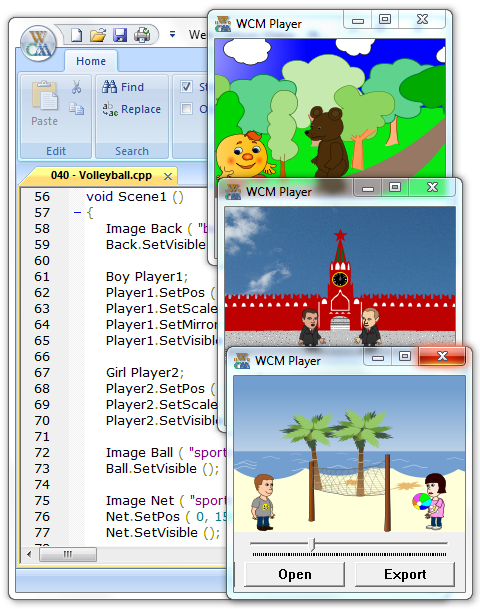
Web Cartoon Maker 1.5 is finally here! You can download it
HERE!
Here is what was updated in version 1.5:
Web Cartoon Maker Desktop Edition is now fully standal


 Alan Sturgess shared an excellent video he made using Tales Animator! You can still download Tales Animator here. Unfortunately it is only available for Wi
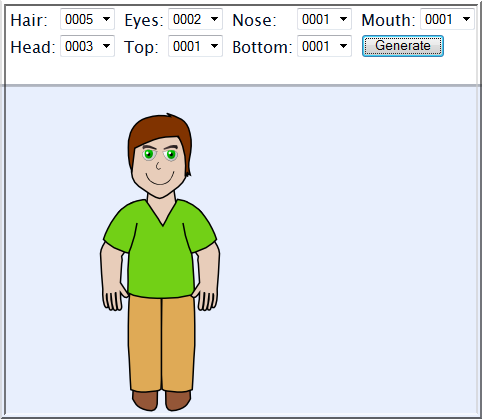 There is a prototype of simple online character designer available
HERE. It is only a prototype,
it does not contain many pieces yet but it can already generat
There is a prototype of simple online character designer available
HERE. It is only a prototype,
it does not contain many pieces yet but it can already generat Now our book "Web Cartoon Maker: A Fun Way to Learn C++" is fully in synch with WCM 1.5!
It is available for download and online reading HERE.
Now our book "Web Cartoon Maker: A Fun Way to Learn C++" is fully in synch with WCM 1.5!
It is available for download and online reading HERE.
 Web Cartoon Maker 1.5 is finally here! You can download it
HERE!
Here is what was updated in version 1.5:
Web Cartoon Maker Desktop Edition is now fully standal
Web Cartoon Maker 1.5 is finally here! You can download it
HERE!
Here is what was updated in version 1.5:
Web Cartoon Maker Desktop Edition is now fully standal